Well, as you can see, there's no cake. That was a shameless ploy on my part to get you to come back today. If you don't know what I'm talking about, then WELCOME! I thought it would be interesting to show you a "straight out of the camera" version of a recent image then take you through the post processing. While you can't make a badly shot image gallery worthy, you can take your good images and tart them up a bit. I said "tart" because that's what British people say and they always sound smart.
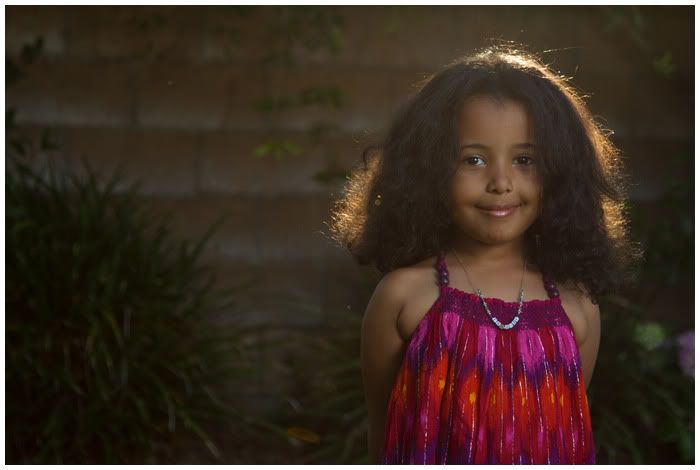
Alrighty, on with the show. I took the Compact Flash card out of my camera, put it in the card reader attached to my computer, opened Lightroom 3, did a little keywording, then imported. When I got to the image in question, here's what I saw:

Her expression. Awesome. In focus? Check. Balance of off camera flash to ambient light? Right where I wanted it. Problems. Something I noticed with all my images from this session, white balance. I had my camera set to Sunny for all the shots, but they looked a bit cold so I changed the setting to Cloudy in Lightroom and they warmed right up. This is one of the main reasons why shooting in RAW (if your camera allows) is so important. If you shoot in RAW, then the white balance is something you can change later with no degradation of your image whatsoever. If you shoot in JPEG and want to change the white balance later, you will start losing quality. Ok, down off the RAW soapbox.
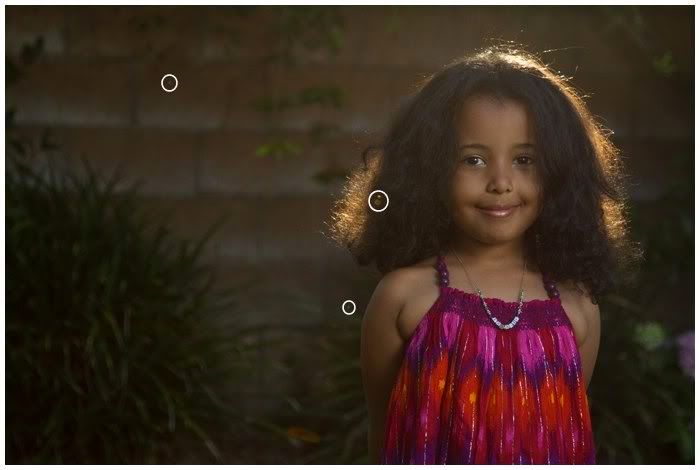
Next were the flare spots. I purposely brought lens flare in while I was shooting to get a certain look, but some of these hot spots were distracting.

I used the spot removal tool in Lightroom to clone those out.
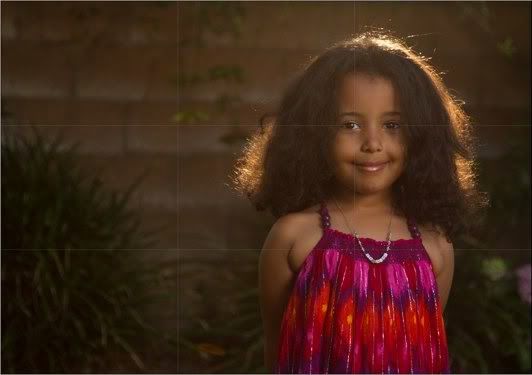
Next was composition. I felt there was a bit too much room on the left, so I brought that in a little. If you think of the rule of thirds, where the the image is divided up into 9 identical sections, I placed her right eye at the intersection of two of these lines.

Sometimes, these intersections are thought of as "power points" and if your subject is placed there, it can strengthen your image. As with everything in photography, this is more of a guideline than a rule.
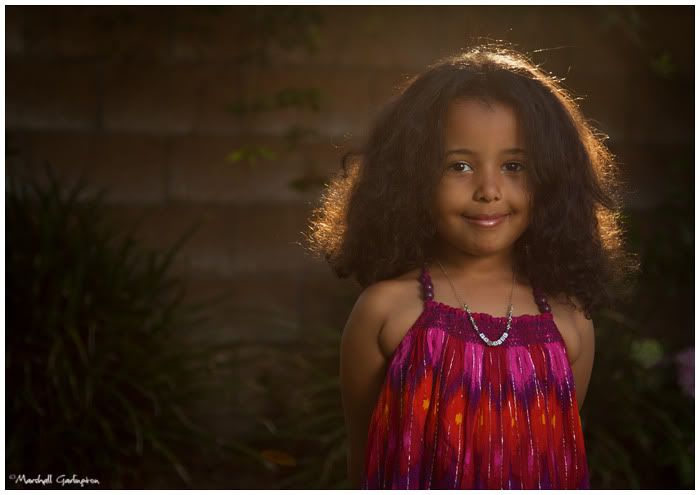
Next, I thought she could be brought out more from the rest of the image, so added some vignetting, sort of. Instead of just using the vignetting slider in Lightroom, which gives you an even darkening all the way around the image, I used the Graduated Filter tool with a slight underexposure. I used two of these, one on each side to tone those areas down and make her pop a little more from the rest of the image. This is subtle, but can really enhance your image. Remember the tarting?
The last thing I did was remove a few spots from her face that were either dirt or little scratches. In the interest of protecting a ladies' dignity, I won't show a picture with those circled.
As with all the images I post to the web, I run them through Photoshop's Save For Web feature and add just a touch of Smart Sharpening to increase tartiness. Is that a word?
Here's the final image.

I hope this was informative and life changing. Alright, that's too much to hope for, I'll stick with informative. Now go out and shoot something!


1 comment:
Very pretty little girl. Yes your info was informative. But still, pretty girl !
Post a Comment